Kuromi is one of those characters that just grabs your attention. Mischievous and cute, she’s got a personality that’s hard to resist.
If you’re a fan, you might have thought about drawing her. But where do you start?
This guide breaks down how to draw Kuromi into simple, easy-to-follow steps. Perfect for beginners and fans alike.
By the end, you’ll have a drawing you can be proud of. Whether it’s for fun, a gift, or just to practice your skills.
No special artistic talent needed. Just a bit of patience and a love for the character. That’s all it takes.
So, are you ready to bring kuromi tekenen to life? Let’s get started.
Gathering Your Tools: Simple Supplies for a Perfect Kuromi
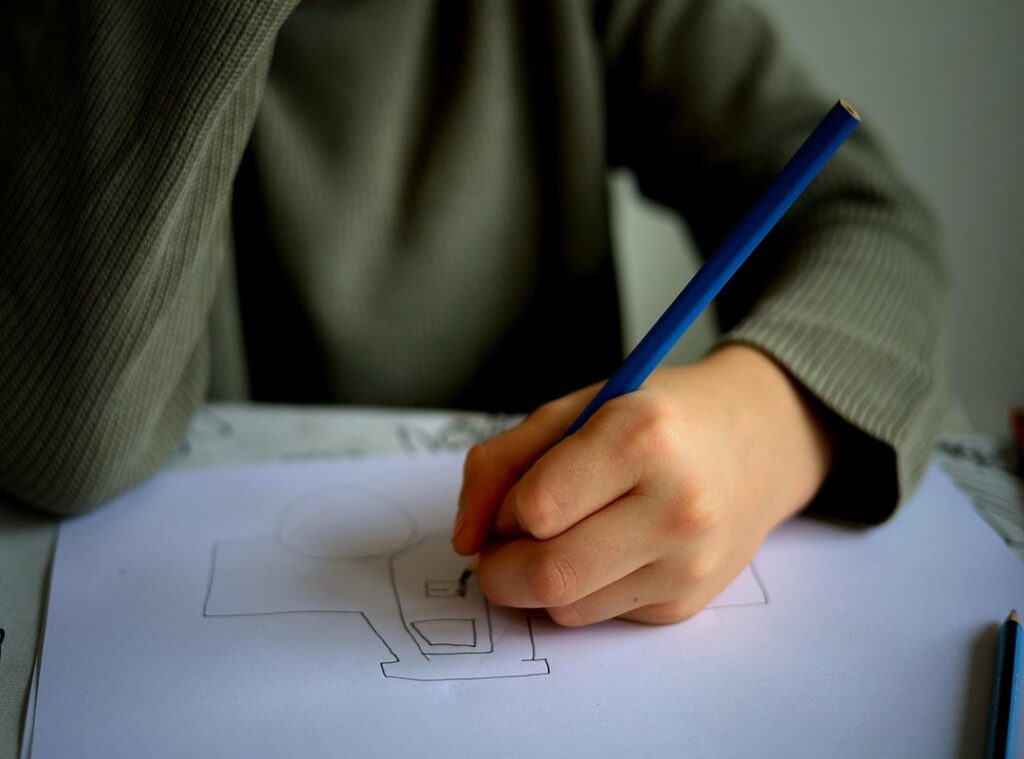
Let’s get started with the basics. You’ll need a pencil, an eraser, some paper, and fine-liner pens. For the pencil, I suggest an HB.
It’s perfect for light sketching and easy to erase.
A quality eraser is a must. Trust me, you’ll be using it a lot. It helps clean up those initial lines without leaving any marks behind.
For paper, go with drawing paper over standard printer paper. Drawing paper is thicker and can handle more layers of ink and color. Plus, it gives your work a professional look.
Fine-liner pens are great for inking. They give you sharp, clean lines that make your Kuromi stand out.
If you want to add color, consider colored pencils, markers, or even digital art software. These tools can bring your character to life.
Kuromi’s specific color palette includes black, dark gray, magenta or pink, and white for highlights. Stick to these colors to keep her true to her style.
Pro tip: Set up your drawing space with good lighting. This avoids shadows and makes the process more enjoyable and accurate.
Now, you’re all set to start kuromi tekenen. Enjoy the creative journey!
Understanding Kuromi’s Design: The Key Shapes to Master First
I remember the first time I tried to draw Kuromi. It was a mess. But over time, I learned that breaking down complex characters into simple geometric shapes is the key.
This is the foundation of cartooning.
Kuromi’s head isn’t a perfect circle. It’s more like a rounded, slightly wide oval. This shape serves as the base for everything else.
Her iconic jester-style hat is another story. Imagine two long, floppy ear-like shapes with rounded ends. And don’t forget the pink skull emblem on the front.
It’s what makes her design so distinctive.
Now, let’s talk about her facial features. Her eyes are large and expressive, shaped like ovals. She has a tiny triangle nose and a signature cheeky grin or smirk.
These small details really capture her personality.
One thing that often gets overlooked is the jester collar around her neck. It adds a touch of whimsy, and and then there’s her pointed, devil-like tail. kuromi tekenen
It’s these little touches that bring her to life.
When you’re learning kuromi tekenen, start with these basic shapes. Once you get them right, the rest falls into place. Trust me, it makes all the difference.
Drawing Kuromi’s Head and Face: A Step-by-Step Guide
Drawing Kuromi can be a fun and rewarding experience. I remember when I first tried to draw her, I was a bit overwhelmed. But with some practice, it became much easier.
Step 1: Start by lightly sketching the main oval shape for her head. Draw faint vertical and horizontal guidelines through the center to help with feature placement.
Step 2: On top of the head, sketch the two large, floppy ‘ears’ of her jester hat. Make sure one has a slight bend or fold to give it character.
Step 3: Draw the skull emblem on the hat. Begin with a circle and then add the simple eye sockets and nose cavity.
Step 4: Using your guidelines, place her eyes. Draw two large ovals on the horizontal line, spaced evenly apart, and add smaller circles inside for pupils.
Step 5: Add the small, triangular nose right between the eyes on the vertical guideline, and then carefully draw her characteristic smirk just below it.
Step 6: Once satisfied with the sketch, go over the final lines with a darker pencil or a fine-liner pen and gently erase the initial guidelines.
One of my friends, who’s a big fan of kuromi tekenen, told me, “The key is to get the proportions right. Once you have that, the rest falls into place.” It’s true. Getting those initial shapes and guidelines correct makes all the difference.
- Pro Tip: Use a light touch with your pencil in the early stages. This way, you can easily erase and adjust as needed.
Drawing Kuromi isn’t just about following steps. It’s about capturing her unique personality and style. So, take your time, and don’t be afraid to make mistakes.
After all, every artist starts somewhere.
Creating Kuromi’s Body and Signature Outfit

Kuromi’s body is small and simple compared to her head, a common feature in ‘chibi’ or cute character design. Start by drawing a small, pear-shaped torso directly below the head, making sure it’s proportional.
Next, sketch her simple, stubby arms and legs. Her hands can be drawn as simple mitten-like shapes or small ovals. This keeps the design clean and easy to follow.
Draw her jester collar. It consists of a series of rounded, triangular points that wrap around her neck. This adds a playful and distinctive touch to her outfit.
Finally, add her thin, pointed devil tail coming from her lower back. The tail often ends in a heart or spade-like shape, adding a bit of mischief to her look.
If you’re following along with kuromi tekenen, these steps should help you capture her unique style. Keep practicing, and soon you’ll have a perfect little Kuromi on your page.
Your Kuromi Masterpiece is Complete! What’s Next?
Congratulations on successfully drawing kuromi tekenen! You followed the steps and created something truly great.
The core lesson here is that breaking any character down into simple shapes is the key to drawing anything you want.
Now, bring your drawing to life with color. Add your own creative flair, like a different facial expression or a fun accessory.
Why not try drawing other Sanrio characters next? My Melody and Cinnamoroll are great choices to continue practicing your new skills.
 Arlanicol Horstmans is the kind of writer who genuinely cannot publish something without checking it twice. Maybe three times. They came to nutrition and recovery approaches through years of hands-on work rather than theory, which means the things they writes about — Nutrition and Recovery Approaches, Pro Perspectives, Metabolic Conditioning Insights, among other areas — are things they has actually tested, questioned, and revised opinions on more than once.
That shows in the work. Arlanicol's pieces tend to go a level deeper than most. Not in a way that becomes unreadable, but in a way that makes you realize you'd been missing something important. They has a habit of finding the detail that everybody else glosses over and making it the center of the story — which sounds simple, but takes a rare combination of curiosity and patience to pull off consistently. The writing never feels rushed. It feels like someone who sat with the subject long enough to actually understand it.
Outside of specific topics, what Arlanicol cares about most is whether the reader walks away with something useful. Not impressed. Not entertained. Useful. That's a harder bar to clear than it sounds, and they clears it more often than not — which is why readers tend to remember Arlanicol's articles long after they've forgotten the headline.
Arlanicol Horstmans is the kind of writer who genuinely cannot publish something without checking it twice. Maybe three times. They came to nutrition and recovery approaches through years of hands-on work rather than theory, which means the things they writes about — Nutrition and Recovery Approaches, Pro Perspectives, Metabolic Conditioning Insights, among other areas — are things they has actually tested, questioned, and revised opinions on more than once.
That shows in the work. Arlanicol's pieces tend to go a level deeper than most. Not in a way that becomes unreadable, but in a way that makes you realize you'd been missing something important. They has a habit of finding the detail that everybody else glosses over and making it the center of the story — which sounds simple, but takes a rare combination of curiosity and patience to pull off consistently. The writing never feels rushed. It feels like someone who sat with the subject long enough to actually understand it.
Outside of specific topics, what Arlanicol cares about most is whether the reader walks away with something useful. Not impressed. Not entertained. Useful. That's a harder bar to clear than it sounds, and they clears it more often than not — which is why readers tend to remember Arlanicol's articles long after they've forgotten the headline.